How to programm firmware via webserver in console mode?
How to programm firmware via ethernet interface in console mode?
The console mode allows access to the netX 90 via UART and Ethernet interface. This “console mode interface” is determined by the configuration settings of the SQI_SIO0, SQI_SIO1 and SQI_SIO2 pins.
Set SQI_SIO0, SQI_SIO1 and SQI_SIO2 to high, then the default console mode (chip interface: UART and ethernet) is enabled.
For NXHX90-JTAG board, it means set S400.5 to on, set S400.0, 1 and 2 to off, then the sys led blinks yellow.
Connect NXHX90-JTAG board with an ethernet cable to your PC, and you need a DHCP server to assign IP address for netX90.

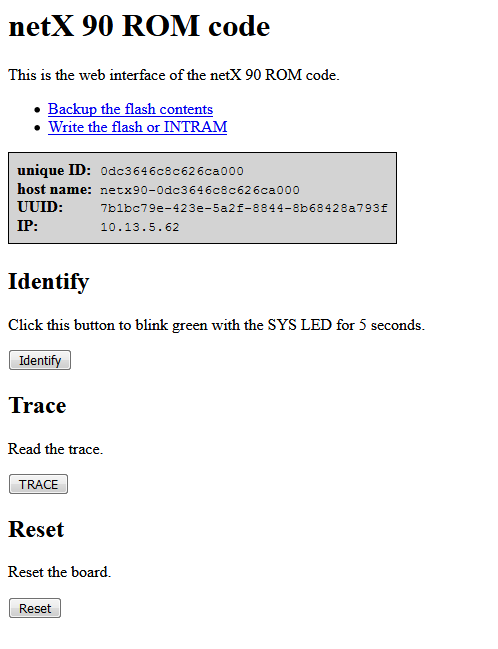
Open the netX 90 ROM site with the assigned IP address in a browser. You can click Identify to check if the connected board is correct.

Click "Write the flash or INTRAM", and you can select the flash image you want and programm it by clicking the button "send the file".
![]() Note: You must write a complete flash image (*.hwc, *.fdl and *.nxi, and also *.mfw, *.mwc joint together in one single binary) to intflash COM. You can create such an image by using a NXHX 90-JTAG evaluation board, flash the single files step by step using the netX STUDIO flasher tool, and readout the complete 1MB flash content into one flash dump file at the end.
Note: You must write a complete flash image (*.hwc, *.fdl and *.nxi, and also *.mfw, *.mwc joint together in one single binary) to intflash COM. You can create such an image by using a NXHX 90-JTAG evaluation board, flash the single files step by step using the netX STUDIO flasher tool, and readout the complete 1MB flash content into one flash dump file at the end.
If you write only one single firmware *.nxi instead of a complete flash image, it will not work, since no valid FDL and HWC are available.

If it succeeds, you can get a following feedback.

Change back to normal mode, the new firmware will run after a reset!
If you connect netX90 directly to your local network, IP address will be automatically assigned, and you can see netX90 ROM device under your netwok.

By double click it, the same interface will be opened, and you can identify or write the flash as you want.